When it comes to installing Geissele triggers, ensuring firearm safety is of utmost importance. In this comprehensive installation guide, we will walk you through the step-by-step process of installing Geissele triggers, including the Single-Stage Precision (SSP) trigger and the SSA-E Two Stage AR-15 Trigger. Additionally, we will also cover the installation process for the Geissele Super Modular Rail MK4 M-LOK. So if you’re ready to enhance the performance of your weapon with Geissele accessories, let’s get started!
Key Takeaways:
- Follow the 4 Rules of Firearm Safety when installing Geissele triggers.
- Unload your rifle and remove the existing trigger before cleaning the receiver.
- Properly align the pin holes when installing the new trigger.
- Reinstall the safety and hammer, lubricate key areas, and perform safety checks for proper operation.
- Regular maintenance and troubleshooting can help maintain the performance of your Geissele products.
Geissele SSP Trigger Installation Instructions
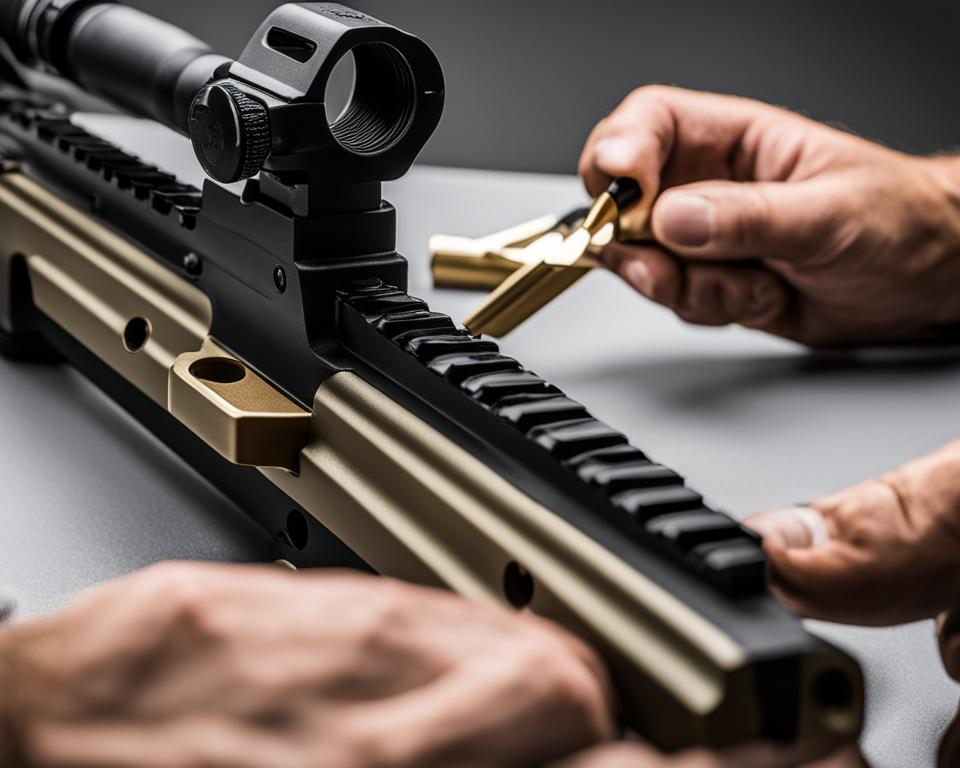
When it comes to installing the Geissele Single-Stage Precision (SSP) trigger, there are a few essential steps you need to follow. By ensuring the firearm is unloaded and taking the necessary precautions, you can complete the installation process smoothly and efficiently.
Begin by removing the existing trigger and thoroughly cleaning the receiver. This will provide a clean surface for the installation of the Geissele SSP trigger. Take care when handling the trigger and be mindful of any small parts that may be included.
Next, replace the trigger pin with the slave pin provided in the Geissele SSP trigger installation kit. This pin will hold the trigger in place while you align it with the pin holes in the rifle. Once aligned, carefully install the trigger and slave pin into the rifle.
After installing the trigger, you can proceed to reinstall the safety and hammer. Take care to align these components properly and ensure they are functioning correctly. Apply lubricant to the recommended areas as stated in the Geissele SSP trigger installation instructions. Once everything is in place, perform a safety check and test the trigger reset to ensure proper operation.
Geissele SSP Trigger Installation Process:
- Unload firearm and remove existing trigger
- Clean receiver thoroughly
- Replace trigger pin with slave pin
- Align trigger and install into rifle
- Reinstall safety and hammer
- Apply lubricant to recommended areas
- Perform safety check and test trigger reset
Following these step-by-step instructions will help you successfully install the Geissele SSP trigger. Always refer to the manufacturer’s installation guide and exercise caution when working with firearms. If you have any questions or encounter any issues during the installation process, consult the Geissele installation tutorial or reach out to their customer support for assistance.
Geissele SSA-E Two Stage AR-15 Trigger Installation Guide
Installing the Geissele SSA-E Two Stage AR-15 Trigger is a straightforward process that can greatly improve the performance of your rifle. This installation guide will walk you through the necessary steps to ensure a successful installation. Before beginning, make sure you have the appropriate tools and a clear workspace.
1. Remove the upper group: Start by separating the upper and lower receivers of your AR-15. This can be done by pushing out the takedown pins and separating the two halves. Set aside the lower receiver for now.
2. Understand trigger operation: Take a moment to familiarize yourself with how the Geissele SSA-E trigger operates. This will help you understand the components and their proper placement during installation.
3. Take before pictures: It’s always a good idea to take pictures of the original trigger assembly before disassembly. This can serve as a reference in case you need to backtrack or seek assistance later on.
4. Disassemble the trigger: Begin by removing the hammer pin, disconnector, trigger pin, and trigger from the lower receiver. Take care not to lose any small components during this process.
5. Clean the trigger area: Thoroughly clean the trigger area of the lower receiver, removing any dirt, debris, or excess lubricant. This will ensure smooth operation of the new trigger.
6. Replace the trigger pin: Insert the temporary pin provided with the Geissele SSA-E trigger kit into the trigger pin hole. This will hold the trigger assembly in place during installation.
7. Install the trigger assembly: Place the Geissele SSA-E trigger onto the lower receiver, aligning the pin holes with the temporary pin. Once aligned, remove the temporary pin and replace it with the trigger pin. Ensure the trigger is securely in place.
8. Rotate the safety: With the trigger installed, rotate the safety selector switch to test for proper operation. The safety should engage and disengage smoothly, without any binding or resistance.
9. Reassemble the upper group: Once you are satisfied with the trigger installation, reassemble the upper and lower receivers of your AR-15.
Follow these steps carefully and refer to the Geissele SSA-E Two Stage AR-15 Trigger installation guide for additional information or troubleshooting tips. With proper installation, the Geissele SSA-E trigger will provide enhanced performance and reliability for your rifle.

Table: Geissele SSA-E Trigger Installation Tools
| Tool | Description |
|---|---|
| Punch Set | Used to remove pins during disassembly |
| Armorers Wrench | Used to remove and install the barrel nut |
| Allen Wrench Set | Used for various screw and bolt sizes |
| Trigger Slave Pin | Used to hold trigger assembly in place during installation |
| Lubricant | Used to ensure smooth operation of trigger components |
Geissele Super Modular Rail MK4 M-LOK Installation Guide
The Geissele Super Modular Rail MK4 M-LOK is a lightweight and versatile accessory for AR-15 rifles. In this installation guide, we will walk you through the step-by-step process of installing this rail system to enhance the functionality and customization of your firearm.
Installation Steps:
- Ensure the firearm is unloaded and follow proper safety procedures.
- Remove the existing flash hider, handguard, front sight, and gas block.
- Use the Geissele barrel nut wrench to remove the stock barrel nut.
- Install the Geissele barrel nut onto the upper receiver and tighten it securely.
- Align the top M1913 rail of the Geissele Super Modular Rail MK4 M-LOK with the upper receiver rail.
- Insert and tighten the rail mounting bolts to secure the rail system in place.
Once the rail system is properly installed, you can utilize the M-LOK attachment system to add various accessories such as grips, lights, and lasers to customize your AR-15 according to your needs and preferences.
With the Geissele Super Modular Rail MK4 M-LOK, you can enhance the versatility and functionality of your AR-15 rifle, allowing for easier attachment and reconfiguration of accessories as desired.
| Benefits of Geissele Super Modular Rail MK4 M-LOK: | Features: |
|---|---|
|
|
Troubleshooting and Maintenance Tips for Geissele Installations
Regular maintenance is crucial for optimal performance of your Geissele triggers and accessories. By following these simple troubleshooting and maintenance tips, you can ensure that your firearm operates smoothly and reliably.
Proper Lubrication
Applying lubricant to specific areas as recommended by Geissele Automatics is essential for the longevity and functionality of your installation. Ensure that you use an appropriate lubricant that is compatible with your firearm. When applying lubricant, focus on key areas such as the trigger assembly, pins, springs, and other moving parts. This will help reduce friction, prevent wear and tear, and maintain consistent performance.
Cleaning and Inspection
Cleaning your Geissele installation regularly is vital to remove dirt, debris, and built-up residue. Start by disassembling the trigger assembly and using a suitable cleaning solution to remove any contaminants. Use electrical contact cleaner and compressed air to flush out hard-to-reach areas. After cleaning, inspect all components for signs of wear, damage, or corrosion. Replace any worn-out or damaged parts to ensure the continued reliability of your installation.
Troubleshooting Tips
If you experience any issues with your Geissele installation, consider the following troubleshooting tips:
- Check for proper alignment: Ensure that all components are correctly aligned and seated in their respective positions. Misalignment can cause malfunctions and reduced performance.
- Ensure the hammer is not cocked: A cocked hammer may prevent proper trigger operation. Make sure the hammer is in the uncocked position before troubleshooting.
- Consult Geissele Automatics: If you encounter persistent issues or have any questions regarding your installation, reach out to Geissele Automatics for guidance and support. They have a team of experts who can provide valuable assistance.
By following these troubleshooting and maintenance tips, you can ensure that your Geissele installation performs optimally and consistently. Regular care and attention will enhance the reliability and longevity of your firearm, giving you peace of mind during every use.

Conclusion
Installing Geissele triggers and accessories can greatly enhance the performance of your AR-15 rifle. By following the step-by-step installation guides provided, you can ensure a proper installation and functionality of your Geissele products. Remember, firearm safety is of utmost importance when working on your weapon. Always follow the 4 Rules of Firearm Safety and unload your rifle before starting any installation process.
Maintaining your Geissele products is also crucial for optimal performance. Regular maintenance should include applying lubricant to the recommended areas and cleaning with electrical contact cleaner and compressed air to remove dirt and oil. Additionally, troubleshooting any issues that may arise, such as checking for proper alignment and ensuring the hammer is not cocked, can help maintain the performance of your Geissele installations.
If you have any concerns or require additional assistance during the installation process, do not hesitate to reach out to Geissele Automatics for support. Their experts are available to answer any questions you may have and provide guidance to ensure a successful installation. With Geissele triggers and accessories, you can take your AR-15 rifle to the next level of performance.
FAQ
What are the key steps to install Geissele triggers?
Unload the firearm and remove the existing trigger. Clean the receiver and install the new trigger, aligning the pin holes. Reinstall the safety and hammer, lubricate key areas, and perform safety checks for proper operation.
How do I install the Geissele Single-Stage Precision (SSP) trigger?
Ensure the firearm is unloaded, remove the existing trigger, and clean the receiver. Replace the trigger pin with the slave pin. Install the trigger and slave pin into the rifle, followed by the safety and hammer. Apply lubricant to specific areas, check safety operation, and test trigger reset.
What is the installation guide for the Geissele SSA-E Two Stage AR-15 Trigger?
Remove the upper group, understand how the trigger operates, and take before pictures of the original trigger. Remove the hammer pin, disconnector, trigger pin, and trigger. Clean the trigger area and replace the trigger pin with the temporary pin. Install the trigger assembly, rotate the safety, and reassemble the upper group.
How do I install the Geissele Super Modular Rail MK4 M-LOK?
Remove the existing flash hider, handguard, front sight, and gas block. Use the Geissele barrel nut wrench to remove the stock barrel nut and install the Geissele barrel nut. Install the SMR handguard, align the top M1913 rail, and tighten the rail mounting bolts. Utilize the M-LOK attachment system for accessories.
What maintenance is required for Geissele installations?
Apply lubricant to specific areas as recommended. When cleaning, use electrical contact cleaner and compressed air to remove dirt and oil. Flush with a light lubricant and reapply lubricant to key areas. Troubleshoot by checking for proper alignment and ensuring the hammer is not cocked.
Where can I get additional support for Geissele installations?
Contact Geissele Automatics for any questions or issues you may have.
Leave a Reply