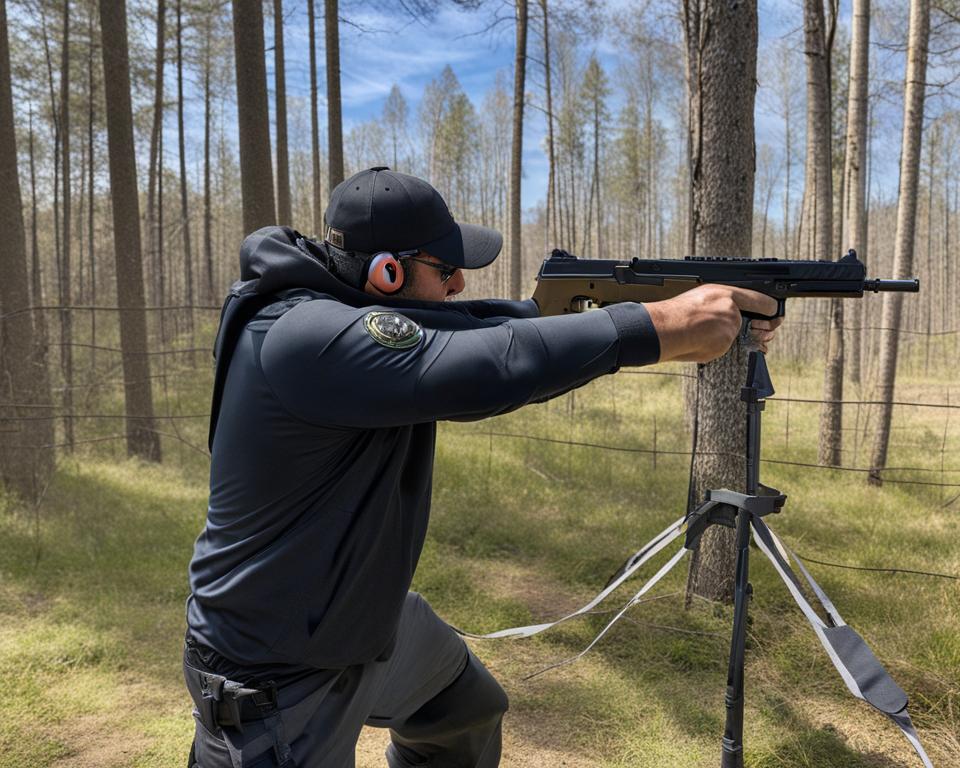
Welcome to our guide on improving your firearm skills with effective Glock 43X training drills. Whether you are a beginner looking to develop your pistol proficiency or an experienced shooter seeking to enhance your marksmanship, these drills will assist you in honing your skills for both concealed carry and self-defense situations.
We understand the importance of firearms training, which is why we have curated a selection of shooting drills specifically designed for the Glock 43X. These drills cover a range of essential skills, from basic marksmanship and handgun practice to tactical shooting and concealed carry drills.
For those who are unfamiliar, the Glock 43X is a compact and reliable pistol that is popular among concealed carry enthusiasts. Its ergonomic design and ease of use make it an excellent choice for shooters of all levels.
Key Takeaways:
- Engage in firearms training to improve your shooting skills.
- Implement a variety of Glock 43X training drills for comprehensive skill development.
- Practice basic marksmanship, pistol handling, and concealed carry techniques.
- Include tactical shooting drills for self-defense scenarios.
- Regularly assess your progress to track improvement and identify areas for further training.
Finding the Right Shooting Drills for Concealed Carry Training
When it comes to concealed carry training, choosing the right shooting drills is crucial for developing the necessary skills to defend yourself effectively. Just like selecting exercises for a workout, the shooting drills you incorporate into your training should target the specific areas you want to improve. Whether you are focusing on defensive shooting skills or honing your competitive shooting abilities, finding the right drills will make a significant difference in your progress.
One popular shooting drill that can be adapted for concealed carry training is the El Presidente. Originally designed by renowned shooter Jeff Cooper, this drill challenges the shooter’s speed and accuracy. It involves engaging multiple targets from varying distances while incorporating reloads and transitions between targets.
While the El Presidente drill was initially intended for use with large-caliber pistols and revolvers, you can modify it to suit modern concealed carry firearms. By reducing the distance and incorporating defensive shooting techniques, the El Presidente drill becomes more applicable to concealed carry scenarios.
Example: Modified El Presidente Drill for Concealed Carry Training
To replicate an effective concealed carry experience, adapt the El Presidente drill using the following steps:
- Position three targets at equal distances, approximately 5 yards apart.
- Stand facing away from the targets, keeping your concealed carry firearm holstered.
- On the command to start, turn, draw your firearm, and engage each target with two rounds.
- Perform a reload, either by dropping and replacing the magazine or using a speed loader, and engage each target with two additional rounds.
- Practice this drill multiple times, aiming to improve your speed and accuracy with each repetition.
Remember to prioritize safety during any shooting drill. Always ensure proper range supervision and follow all safety protocols.
| Common Shooting Drills for Concealed Carry Training | Description |
|---|---|
| Bill Drill | Aimed at improving draw speed and shot accuracy, this drill involves firing multiple rounds into a target within a specified time limit. |
| Five-Yard Roundup | Designed to simulate high-stress situations, this drill features rapid-fire engagement of multiple targets at close range. |
| Failure to Stop Drill | Focuses on shot placement and threat assessment by requiring shooters to engage a target with multiple shots until it stops presenting a threat. |
| Strong Hand/Weak Hand Shooting | Develops proficiency in shooting with both hands individually, as well as transitions between strong and weak hand positions. |
These drills represent just a few examples of the many shooting drills available for concealed carry training. However, it’s essential to choose drills that align with your specific training goals and desired skill set. Remember to start with the fundamentals and gradually progress to more advanced drills as your proficiency improves. Always seek professional guidance and training to ensure proper technique and safety.
The Benefits of the Step Back Drill
The Step Back Drill is a highly effective training exercise that can significantly improve your shooting skills. This drill focuses on key fundamentals such as drawing from the holster, target transition, and recoil control, making it an essential practice for shooters of all levels.
The setup for the Step Back Drill is relatively simple. Begin by placing your target at a distance that challenges your accuracy and speed. Start at a comfortable range and gradually increase the distance as your skills improve.
The course of fire for the Step Back Drill involves engaging the target with a predetermined number of rounds, then taking a step back and repeating the process. This progression allows you to practice drawing from the holster, acquiring sight picture, and firing accurately in a controlled manner.
One of the significant benefits of the Step Back Drill is its ability to enhance your speed and consistency. By recording your times for each distance, you can track your progress and strive for improved performance with each repetition.
Additionally, incorporating handgun presentations into the drill further enhances your overall proficiency. The ability to draw your pistol quickly and accurately is essential for self-defense situations, and the Step Back Drill provides an excellent opportunity to sharpen this critical skill.
Key Benefits of the Step Back Drill:
- Improves drawing from the holster
- Enhances target transition speed
- Develops recoil control and follow-up shots
- Increases overall shooting accuracy
- Builds muscle memory for self-defense scenarios
Whether you’re a novice shooter looking to build a solid foundation or an experienced marksman seeking to refine your skills, the Step Back Drill is a valuable addition to your training regimen. Practicing this drill regularly, along with proper dry-fire practice, will undoubtedly take your shooting abilities to the next level.

Choosing the Right Shooting Drills for Your Training Goals
When it comes to improving your shooting skills, selecting the right drills is crucial. A well-designed training regimen can help you master the shooting fundamentals, enhance your draw, aim, and shoot accuracy, and achieve consistent hits on targets.
With a plethora of shooting drills available, it’s easy to get overwhelmed. However, it’s important to focus on drills that align with your specific training goals. Whether you’re honing your skills for concealed carry, self-defense, or competitive shooting, choosing the right drills is key to achieving your desired outcomes.
Start by identifying the fundamental shooting skills you want to improve. Are you looking to enhance your draw speed? Do you need to work on your target acquisition and sight alignment? Or perhaps you want to improve your accuracy and hitting targets consistently. Once you have a clear understanding of your goals, you can narrow down your drill selection.
Here are a few points to consider when choosing shooting drills:
- Focus on the Fundamentals: Look for drills that emphasize the foundational shooting skills, such as drawing from the holster, sight alignment, trigger control, and follow-through.
- Variety and Progression: Incorporate drills that challenge different aspects of your shooting abilities. Start with basic drills and gradually progress to more advanced ones as your skills improve.
- Realistic Scenarios: Consider drills that simulate real-world situations. This helps you practice shooting under stress and develop tactical decision-making skills.
- Comprehensive Training: Choose drills that cover various shooting scenarios, including shooting at different distances, shooting on the move, and engaging multiple targets.
Remember, the key is not to overwhelm yourself with numerous drills but to select a few core drills that address your specific training goals. Consistent practice and mastery of these drills will build and maintain your shooting skills over time.
The Table below provides examples of shooting drills that target specific skills:
| Drill | Target Skill |
|---|---|
| 3×5 Drill | Accuracy and Speed |
| Bill Drill | Draw Speed and Recoil Control |
| Dot Torture | Precision and Trigger Control |
| El Presidente | Target Transitions and Reloads |
| Failure to Stop | Multiple Target Engagement |
By selecting the right shooting drills and incorporating them into your training routine, you can effectively improve your shooting skills and achieve your desired training goals.
Installing and Using the DryFireMag for Glock
One of the most effective ways to improve your Glock training is through dry-fire practice, and the DryFireMag is a valuable tool that can enhance your training sessions. In this section, we will guide you through the process of installing and using the DryFireMag for Glock.
Before installing the DryFireMag, it is crucial to ensure that your weapon is clear of ammunition. Always follow proper safety precautions to prevent accidents or injury during dry-fire practice.
Installing the DryFireMag
To install the DryFireMag, follow these simple steps:
- Begin by releasing the slide on your Glock and visually confirming that the weapon is unloaded.
- With the slide open, set the firing pin using the provided tool or an empty casing. This step is essential as it prevents damage to the firing pin during dry-fire practice.
- Once the firing pin is set, insert the DryFireMag into the magazine well until it locks into place.
- Close the slide, ensuring that it is fully seated and in the correct position.
Now that you have successfully installed the DryFireMag, you are ready to begin your dry-fire practice.
Using the DryFireMag
The DryFireMag allows you to practice your shooting skills without the need for live ammunition. It provides a realistic trigger feel and resets the trigger for each dry-fire repetition. Follow these guidelines for using the DryFireMag:
- Before starting your dry-fire practice session, always ensure that your firearm is clear of ammunition and pointed in a safe direction.
- Choose a suitable target or target area for your dry-fire practice. Ensure that it is free from any distractions or potential hazards.
- Assume a proper shooting stance and grip, just as you would during live-fire practice.
- With the DryFireMag installed, practice your trigger control, sight alignment, and sight picture as you simulate shooting at your chosen target.
- Keep track of your progress by recording your dry-fire practice sessions. Note any areas for improvement and strategize ways to enhance your skills.
Remember, while the DryFireMag is an effective training tool, it should not be used for tactical reload practice. Always adhere to safe handling practices and treat every firearm as if it were loaded.
By incorporating the DryFireMag into your Glock training routine, you can enhance your dry-fire practice and improve your shooting skills. Dedicate regular practice sessions to refine your technique and reinforce the fundamentals of marksmanship.
Additional Considerations and Disclaimer
Before proceeding further, it is essential to acknowledge certain important considerations and a necessary disclaimer. Please note that the DryFireMag discussed in this article is not manufactured, authorized, endorsed, or warranted by GLOCK, the renowned firearm manufacturer. The use of the term “GLOCK” throughout this page is solely for informational and descriptive purposes, highlighting the compatibility between the DryFireMag and GLOCK firearms.
For genuine GLOCK products and parts, it is recommended to visit the official GLOCK website. This will ensure that you obtain authentic GLOCK accessories that are specifically designed and manufactured by the company.
We appreciate your interest and attention to these details. Now, let’s return to discussing our experience with the G43X MOS and the XS R3D sights. While we are satisfied with their performance, we are actively exploring other reflex sight options that effectively address the issue of light reflection. Safety and functionality remain our top priorities as we continue to strive for optimal firearm performance.
FAQ
What are some effective Glock 43X training drills?
There are several effective Glock 43X training drills that can help improve your firearms skills. Some popular drills include the Step Back Drill, El Presidente Drill, and the Bill Drill. Each of these drills focuses on different aspects of shooting, such as drawing from the holster, target transition, and recoil control.
How do I choose the right shooting drills for my concealed carry training?
Choosing the right shooting drills for concealed carry training depends on your specific training goals. It’s important to select drills that focus on fundamental shooting skills, such as drawing, aiming, and hitting targets accurately. It’s also helpful to find drills that replicate real-world self-defense scenarios.
What are the benefits of the Step Back Drill?
The Step Back Drill is a popular training drill that focuses on fundamental shooting skills and can help improve your marksmanship. The drill involves starting at a close distance to the target and progressively stepping back while engaging the target with accurate shots. This drill helps develop skills such as drawing from the holster, target transition, and recoil control.
How do I choose the right shooting drills for my specific training goals?
When choosing shooting drills, it’s important to consider your specific training goals. Focus on drills that align with the fundamental shooting skills you want to improve, such as drawing, aiming, and hitting targets accurately. Avoid getting overwhelmed by the extensive selection of drills available and instead, find a few core drills that are proven to build and maintain your skills.
How do I install and use the DryFireMag for Glock?
Installing and using the DryFireMag for Glock is relatively simple. Begin by ensuring the firearm is clear of ammunition. Set the firing pin of your Glock using the provided tool, then insert the DryFireMag into the magazine well. With the DryFireMag installed, you can then conduct dry-fire practice to improve your shooting skills. It’s important to note that the DryFireMag should not be used for tactical reload practice.
Is the DryFireMag for Glock endorsed by the manufacturer?
No, the DryFireMag for Glock is not manufactured, authorized, endorsed, or warranted by GLOCK. The use of the term “GLOCK” on this page is for informational and descriptive purposes only. For genuine GLOCK products and parts, please visit the official GLOCK website.
Leave a Reply